

Why Dogs Bite
Every year in the United States, 800,000 dog bites are severe enough to need medical treatment; 17 are fatal. Fifty percent of all American children are bitten by a dog before the age of 13. Literally every dog has the potential to bite. Luckily for us, most don’t. Understanding what causes this phenomenon might help you to avoid becoming next year’s dog-bite statistic. The following are six common reasons why dogs bite.

In cases of dogs who bite due to dominance aggression, members of the dog’s human family are most often the victims. Innocently attempt to move a dog off the bed to change the linens; push down on his rump to ensure compliance with a sit command; step over a dog who’s resting inconveniently in the doorway and the dog erupts in a “you’d better not do that” vocal warning, followed by a bite.
In each situation, the dog believes that he is in charge – that his humans have not earned the status to tell him what to do. Dominance aggression is most commonly – but not exclusively – seen in unneutered males and in confident breed types, such as rottweilers, chow chows, Lhasa apsos, English springer spaniels, Old English sheepdogs and Rhodesian ridgebacks, to name but a few. Obedience training as early as possible can abate a dog’s tendency toward dominance aggression, but dogs who are naturally and intractably dominant aggressive must be closely monitored and kept clear of situations known to trigger the negative behavior. Hollywood trainer Shelby Marlo, author of “Shelby Marlo’s New Art of Dog Training: Balancing Love and Discipline,” states, “Management is underrated. There is nothing wrong with knowing the dog’s limitations and living within those boundaries.”
Protection of valuables
The protectiveness some people seek when acquiring a dog can prove to be a liability. Some dogs believe the only way to protect their valuables is through an act of aggression. A dog’s list of valuables may include food, toys, territory (a house or a car) or even their human family members. Dogs have been known to “protect” one family member from another, driving crying children away from their mothers or chasing amorous husbands out of bedrooms.
The protection of territory is most often seen in males of guarding/herding breeds, such as German shepherds and rottweilers, while certain cocker spaniels and Labrador retrievers – females more often than males – put on ferocious displays over toys and chewies resulting in punishing bites to hands and faces.
Again, early training and/or lifelong management are the only solutions.
Fear aggression
The fear aggression response is most often directed toward strangers. Veterinarians learn early in their careers: when in doubt, muzzle. Like people, dogs are naturally fearful of unfamiliar and potentially threatening situations. A dog raised in a quiet adult household will be distraught by noisy, fast-moving youngsters. The dog may bark and lunge to drive them away and deliver a stinging nip to children who do not heed the warning.
There is no particular breed or gender predilection for fear aggression, but these biters commonly lack early socialization to a wide variety of people and experiences. ASPCA Vice President of Behavioral Medicine, Amy Marder, V.M.D., states that “with a dedicated owner and a responsive dog, fear aggression can be greatly improved.”
Maternal aggression
The first two to three weeks after a female dog gives birth, her puppies rely on her for all they need to survive: warmth, nutrition, stimulation to prompt elimination and protection. Even the most outgoing, well-trained dog may show signs of maternal aggression if she feels her newborns are at risk. No training is indicated here, rather an awareness of the new mother’s innate need for a safe space. By limiting visitors to the whelping box to one to two adult family members during those first couple of weeks, the new mother will stay relaxed and focused on the job at hand. There will be plenty of time for socialization once the pups’ eyes are open and they are toddling about under their own steam.
Redirected aggression
An attempt to break up a dog fight is the most common scenario for this category of biting. Two canine opponents are barking, posturing and biting at each other when all of a sudden hands reach in and grab at collars, tails and hind legs. The adrenaline-pumped dogs blindly whip around and land oral blows to body parts of the interrupters.
Fights are best broken up by loud noises or strong blasts of water when available. However, sometimes that is not enough. If you must lay hands on fighting dogs, stay as far away from the mouth as possible and move swiftly and decisively.
Pain-induced aggression
While pain-sensitive breeds like Chihuahuas are common perpetrators, any dog may bite if hurting, depending on the degree of pain. An otherwise gentle dog will bite a beloved owner’s hand trying to soothe, bandage or examine wounds. Like us, each dog has a unique pain threshold and tolerance. A sweet floppy-eared dog suffering from otitis externa may bite on getting his ears tousled; a dog with hip dysplasia may turn on a handler pressing down on his hips to enforce the sit command.
Of course, any dog can be provoked to bite by overly zealous physical disciplining.
Pestered beyond limits
There are dog biting incidents that don’t fit into the aforementioned categories. Perhaps a new category is required, called “Pestered Beyond Limits.” Bites in this category are often prompted by children (or adults) who simply don’t understand that even a dog has limits. Hug a sleeping dog, blow puffs of air in his face, put a rubber banded knee-sox on his nose to turn him into an “elephant dog,” ride him like a pony, stuff him inside a pillowcase just to see if he’ll fit, poke, prod, tickle him, and sooner or later, the dog will say “NO!” the only way he knows how – through a bite.
There are three keys to bite prevention: learn to understand canine behavior, take the time to socialize and train all dogs – the younger the better – and teach children to respect all dogs, starting with their furry buddies at home. With this accomplished, there is no telling how low bite statistics can go.
If you are approached by a menacing dog:
do not attempt to run
stay quiet, and remember to breathe
be still, with arms at sides or folded over chest with hands in fists
avoid eye contact
The Dog And The Meter Reader
In 1997, the safety division of Con Edison, New York City’s utility supplier, set a goal of a 20 percent reduction in worker accidents for 1998. By October, they were on target in every category except dog bites, having surpassed 1997′s 24 bites in the third quarter. Bernard Duffy, project specialist for Environmental Health and Safety, and The ASPCA worked together to create a mandatory half-hour program for all Con Edison customer field representatives. The program aimed at preventing utility worker/dog interactions and minimizing injury should an interaction take place.
Field worker Edwin Gomez credits this ASPCA Bite Prevention Workshop for saving him from a serious injury. Upon arriving at a customer’s home to read the electric meter, Edwin Gomez followed Con Edison’s company policy, and requested that the family dog be secured in another room. That done, Gomez went to work. Before he finished, however, the dog escaped from isolation, flew at Gomez and grabbed his arm.
Fortunately, Gomez remembered the advice he learned at the Bite Prevention Workshop: “If bitten, push into the dog’s mouth instead of pulling away.” And push he did, using his flashlight against his arm for added pressure. Sensing he was no longer in control of the bite, the dog let go and ran away, leaving Gomez shaken but with no more than a couple of small punctures in his sleeve and a sore arm from the tetanus shot he got “just in case.” At last count, dog bite incidents were reduced by more than 50 percent from last year.
Working Like a Dog Beyond the Office

The most rewarding part, he says, is the follow-up photographs when he sees the puppies that are in the arms of the children with their big smiles and new families. “It’s a win-win situation,” Rork says. “I feel like Santa Claus with my sleigh every time I taxi away with the dogs.”
But unlike that other legendary flyer, it’s not a bright-red-nosed Rudolph at the helm of Rork’s “sleigh.” Rather, the cockpit’s shotgun seat — and the sidekick duties — belong to his wet-nosed “co-pilot” Doyle.
Since Dog Is My CoPilot was founded, Rork and Doyle have logged more than 400 hours, and just this past February, they flew their 1,000th dog to safety. All that flying gives Rork plenty of quality time to spend with his canine pal. “He just curls right up and does fine,” he says, adding that dogs, like people, adjust to the altitude without issue.
“I like the company,” Rork says. “He’s my best friend. We’re really a team, and Doyle truly is my co-pilot.”
Working Overtime with Canines
Rork certainly isn’t alone; many workers report having better days when they’re allowed to work alongside their canine companions. A recent study by Virginia Commonwealth University found that employees who brought their dogs to work experienced a reduction in stress level scores of about 11 percent during the workday, while workers who didn’t bring their dogs experienced up to a 70 percent increase in those same stress-level scores.
Dogs also help us interact better with one another, an important attribute even — and maybe especially — in high-intensity workplaces. “Dogs have a way of softening the environment,” says Alan Beck, Sc.D., director of the Center for the Human-Animal Bond at the Purdue University College of Veterinary Medicine in West Lafayette, Ind. “So if you’re having a meeting, a dog gives a focus of attention and takes some of the pressure off. You now have something common to talk about besides how much you’re charging me, or why you want this raise, or why a particular law won’t work.”
That’s how it is for U.S. Rep. Ken Calvert of California’s 42nd District, who brings his 6-year-old MiniatureDachshund Cali to work on Capitol Hill every day.
“Sometimes, you know, people come in here that may not agree with me,” Calvert says. “Almost everybody loves dogs, so Cali takes the edge off.”
Calvert remembers a specific time when a four-star general came into his office to discuss serious business. “Cali just launched into the office and jumped on top of him and started licking his face,” he says. “He had to smile at that. I could tell he loved dogs, too, so we knew he was a good guy.”
As chairman of the Interior, Environment, and Related Agencies Subcommittee and a member of several other congressional committees, pressure often looms large for Calvert. Having Cali around, he says, provides some relief. On a typical day, Cali can be found springing onto the laps of staffers and roving from bed to bed — both Calvert’s Legislative Director Rebecca Keightley and Deputy Chief of Staff Tricia Evans keep dog beds by their desks and dispense a hearty amount of treats. During the workday, Cali has free rein, often hopping up on Calvert’s couch to play or nap, or propping herself right up on his desk to, as Calvert puts it, “help with paperwork.”
Less Stress, More Wags
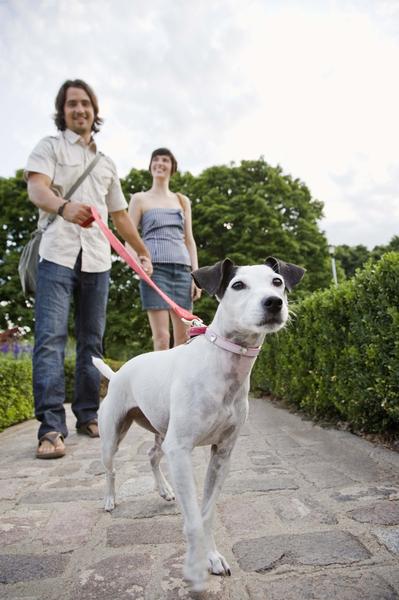
Having dogs around also provides physical benefits. That’s certainly the case for Matthew Offord, a Conservative Member of Parliament for Hendon, a suburb of northwest London. While he spends many of his days out meeting his constituents, on office days, Offord often brings his 3-year-old Jack Russell Terrier Max to work. Offord’s workplace isn’t quite as open to dogs as is the U.S. Congress. “Dogs, except guide dogs, are not generally allowed in the Palace of Westminster, but one or two slip through,” he says.
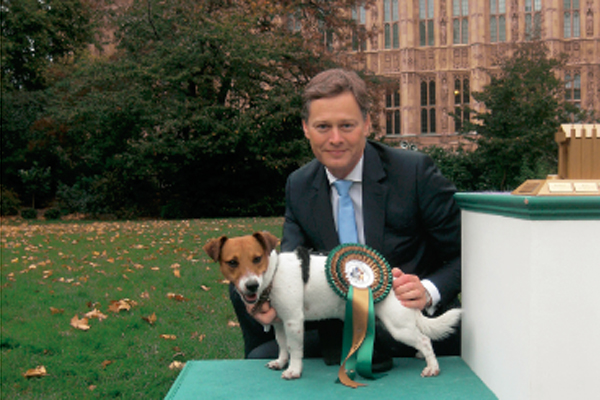
“Taking him for a quick walk also offers an opportunity to get away from sitting at a desk to get a bit of exercise,” he says, “both for me and my staff, who enjoy taking him for walks if I am in the chamber or a meeting.”
For Offord, there are social benefits, too. “When I am out in the constituency, Max often acts as an icebreaker,” he says. “I think some people feel a lot more comfortable when they can share stories with me about their dogs as well. He’s a particular favorite with the children at a residential care home, who sometimes find it easier to communicate with Max than the adults around them.”
Four-Legged Counselors
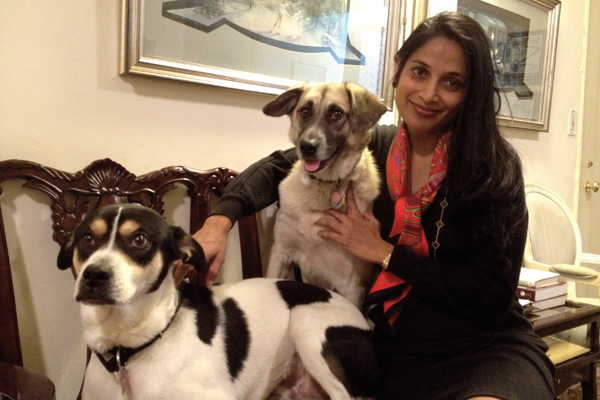
The uncanny ability of dogs to help people interact with one another and relax in stressful situations is one of the many reasons neurologist Gayatri Devi, M.D., director of New York Memory Services in New York City, brings her 4.5-year-old German Shepherd Dog mix Lola and her 5-year-old Boxer mix Gage to work with her each day. “I think the idea of a dog in a doctor’s office is unusual,” she says. “But they make the patients feel better. … Kids, if they’re afraid to be in the doctor’s office, they will see the dogs, get excited, and forget where they are. People with dementia who are nervous when they come in the office, they become so busy petting the dogs they are not as concerned or worried anymore. For the most part, just seeing the animals, it’s such a calming influence.”
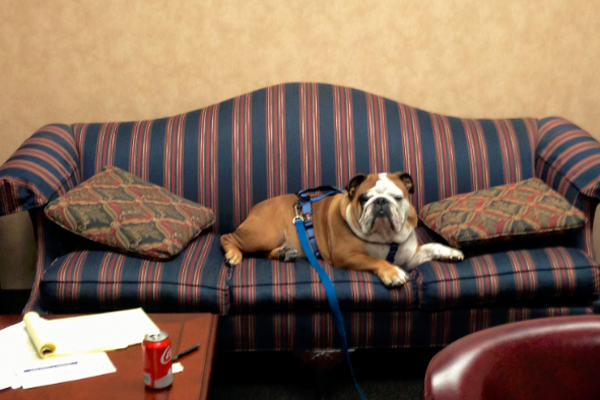
When it comes to the firm’s 14 other staff members, Woods describes Walter as a delight to everyone. “They get a lot of the same benefits that I do,” he says. “They get a good laugh every time Walter comes into their office, or begs for a treat, or asks to play tug of war.”
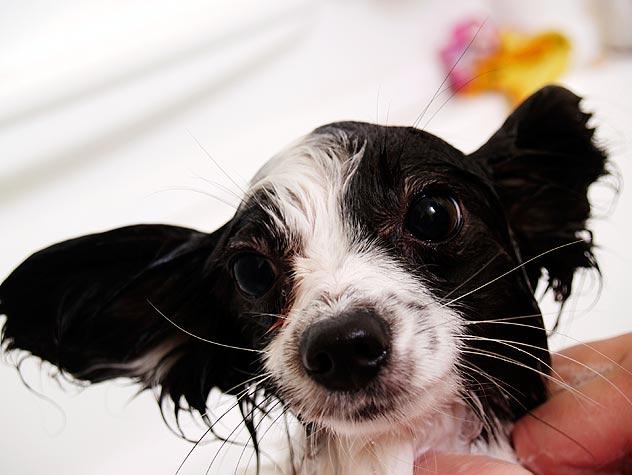
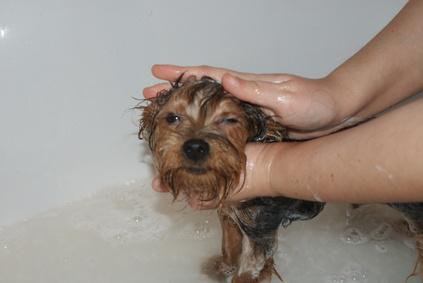
How to Give Your Dog a Bath
As much as we all love for our furry friends to smell fresh and clean, getting to that point isn’t always easy. Dogs are rarely excited to jump into the bathtub for a good scrub. Bathing fearful dogs might be better handled by a professional groomer or your veterinary office. But if you decide to wade in, here are some helpful hints.
GETTING (YOU) READY
GETTING (FIDO) READY
Trimming your pet’s nails prior to bath time will not only give your dog better footing, it will also help protect your skin in case he tries to make a break for it. Now, bring the dog into the bathroom and close the door behind you catching a wet, soapy dog running down your hallway is no easy task! Give praise and treats to make him comfortable in the bathroom before you try to get him into the tub. If you’re able to, gently putting a cotton ball in each ear can help keep water out — just be sure to remove them when you’re finished! Also, to help keep shampoo from irritating his eyes, you can put a drop of mineral oil in each one.
BRING ON THE SUDS
Dogs are unlikely to get into the tub willingly. For bigger dogs, a second person to help you get Fido into the bath can help avoid straining your back. Make sure water isn’t too hot or too cold. Let your dog hear and then gently feel the water before going full-speed ahead with the bath. Start shampooing your dog’s shoulders and then move out from there. Be gentle around the face and any sensitive areas but be sure you get down to the undercoat. Read the directions on the shampoo bottle carefully to ensure proper usage. Rinse out all the shampoo, using your fingers to make sure you get through the undercoat to avoid subsequent irritation. This is where a detachable showerhead or bowl comes in handy to be sure bigger dogs get rinsed thoroughly.
NO MORE TANGLES
After the shampoo has been completely rinsed out, you can apply conditioner, if desired. Follow the directions on the bottle because some products need to sit on the coat for several minutes. If you have a particularly squirmy dog, you’ll want to find a fast-acting formula. Once you have finished the bath, it is time to dry your pooch. Towel dry as much as possible in the bathroom. For dogs with longer coats, you may want to use a blow dryer set on low. Before the dog leaves the bathroom, brush his coat out thoroughly because the bath will loosen up a lot of fur, which is better contained in the bathroom than all over the house. Many dogs get “after-bath-crazies,” so hold onto your hat and let ‘em run!
Dog Health Problems Related to Grooming Products
Skin Irritants
Symptoms of skin problems due to a shampoo allergy include excessive scratching or licking, scabs, hot spots, scaly patches and flaky skin. Like people, dogs’ skin carries natural oils that shampoos can strip. Discontinuation of the offending products will usually stop the allergic reaction. Be certain to use products meant for dogs, rather than human shampoos, as dogs’ skin has a much higher pH level than humans’. Hypoallergenic shampoos are available from groomers and pet supply stores. In addition, veterinarians have prescription shampoos for dogs with severe allergies.
Cancer Threat
Some dog shampoos have strong ingredients including toluene, butyl acetate and ethyl acetate. For example, butyl acetate is a chemical solvent that serves as a foaming agent and is also used in upholstery shampoo and nail polish. These ingredients are thought to contribute to organ problems and an increased cancer rate in laboratory animals and humans. Read the label to find shampoos with less caustic ingredients. Hypoallergenic shampoos and natural-formula shampoos can be found at pet supply stores and from groomers.
Clipping Too Close
A dog’s skin can become irritated if it is clipped too close or if the clippers get too hot and burn the skin. Scabs can appear and the skin can become blotchy, usually clearing up on its own within a week. The skin can be treated with antibiotics if the irritation is severe and persistent.
Health Problems for Dog Groomers
On that proverbial other side of the coin, people who groom dogs can face health problems. These typically stem from daily exposure to chemicals, disinfectants and pesticides in some grooming products and manifest themselves as skin allergies and other maladies. In addition, some dog parasites can be transmitted to groomers. Treatment depends on the exact cause of the problem and often involves changing the dog shampoo and other grooming products used.
Make Your Own Chicken Jerky Dog Treats

If you choose to feed your pet jerky treats, one option is to dry your own treats using a food dehydrator or your oven. This allows you to buy local, high-quality meats, giving you peace of mind about the safety of the ingredients.
Jerky Basics
Dehydration preserves foods by removing moisture, which inhibits the growth of microorganisms. You can dehydrate most raw meats, such as slices of beef, chicken, turkey, fish, or liver, as well as many fruits and vegetables, such as sliced apples, sweet potatoes, and carrots.
Several brands of small dehydrators are reasonably priced and easy to use. These machines have stacked or slide-out trays that hold the food to be dehydrated. A motor provides heat and powers a fan that blows hot air over the food. A tray at the bottom catches excess moisture.
You can also dry foods in your oven — on a cookie sheet — if it can be set at a low enough temperature. The lowest temperature for many ovens is 150 degrees Fahrenheit, and that’s fine. Prop the oven door open a few inches with a towel so hot air laden with moisture can escape. This works well, but because your oven is also heating the air in the kitchen, it uses more energy than a food dehydrator would.
Store dehydrated foods in airtight containers in the refrigerator or freezer. Protect these foods from moisture and humidity, or they will spoil.
The American Veterinary Medical Association advises pet owners who feed jerky treats to do so in small quantities and only on occasion, especially with small-breed dogs.
Chicken Jerky Strips
The thinner you slice the meat, the less time it takes to dry. Popping the meat into the freezer for about 15 minutes beforehand makes it easier to slice thinly.
Ingredients
1 1/2 pounds boneless skinless chicken breast tenders, sliced into strips about 1/8 to 1/4 inch thick
1/2 cup vegetable oil
Directions
Rinse off chicken breast and remove any fat. Fat slows down the dehydrating process and makes your jerky spoil faster. Slice the chicken with the grain. This will help make the jerky even chewier.
Lightly coat the chicken slices with vegetable oil to prevent sticking.
Place the chicken breast strips evenly on the tray, leaving space between them and making sure they do not touch each other.
Once they are all in the dehydrator, turn it on and set the temperature to 140 degrees Fahrenheit.
The jerky will probably take between three and 12 hours to fully dry, depending on how thick you cut your slices. Start checking it once every hour after the first hour. To check it, open up the tray and take one slice out. Cut it open with a sharp knife and examine the inside. You should see no moisture at all, and it should be the same color throughout. If it’s not finished, put it back in for another hour. Once it gets close, check every half hour.
Once your jerky is done, store it in airtight containers. Write the date you made it on them. Out of the refrigerator, the treats last about 10 days in an airtight container. They’ll keep in the refrigerator for approximately three weeks. They can also be frozen for up to eight months.
Can You Change a Dog’s Name After Adopting Him?
Positive Association
Whether Beauregard knew his name well or was given that name in the shelter, changing it is as simple as teaching him a new command. Once you’ve decided on his new name, periodically call his new name in a happy, upbeat tone of voice. When he looks at you, praise him enthusiastically and reward him with treats. Even if he doesn’t look at you the first few times, give him a treat when you say his new name. Soon he will start looking at you when you say his name because he knows that word means something good. Continue to cheerfully say his name and reward him with treats multiple times a day for a few weeks.
It may take some dogs just a few times to learn a new name; for others it may take a few weeks. Attaching his new name to a fun game like fetch or obedience training also reinforces it: “Toby, get the ball!” “Toby, sit.” “You are such a good boy, Toby!”
Name Pairing
Another way of teaching him a new name is to pair it with his old name for a while and eventually drop the old name. So if his old name was Beauregard, and you want to change it to Toby, start calling him “BeauregardToby.” Eventually drop “Beauregard” and just call him “Toby.”
The Name Itself
Don’t worry if the new name is completely different from his old name. Many people think that the new name should be similar to the old name, such as changing “Dolly” to “Molly.” It really isn’t necessary for them to be similar since dogs associate our tone and actions with the name instead of the actual sound.
Never associate the new name with something negative. Do not call your dog by his new name to scold him or to come to you for something he does not like. You want your dog’s new name to be positive. When deciding on a new name, make sure it doesn’t sound similar to something negative or a correction.
A Fresh Start
For dogs who have been mistreated or who have behavioral issues, a name change is often the first step to changing the dog’s mindset and behavior. If Beauregard was in an abusive home, he may associate his name with mistreatment, so a new name helps to give him a fresh start. A dog who has had behavioral issues may associate his name with the bad behavior you’d like to correct. A new name can help him to respond to positive behaviors.
Electronic Collar Training Tips

Innotek, the manufacturer of a wide array of dog training equipment, suggests adjusting the collar snugly while leaving enough room to easily insert a finger between the strap and the dog’s neck.
Use the collar on clean fur and remove the collar when you are not actively training the dog, taking care not to leave it on your dog longer than 12 hours at one time. The probes on the collar may result in a rash or sores if the collar is too tight or if it is on the dog’s neck too long.
Remove any other collars before fitting your dog with an E-collar. Metal clasps and dog tags may interfere with the efficiency of the receiver.
Training Session
Determine a behavioral goal and employ repetition during the training session. For instance, if your dog barks every time the doorbell rings, recruit an assistant to ring the bell a few times over a period of 15 minutes. When the doorbell rings and your dog barks, issue the command “Shush” and depress the transmitter briefly to reinforce your command.
Begin with the lowest stimulation level on the collar and increase it slightly if your dog does not respond. Some dogs will tolerate a strong shock, while others will become agitated by a low level of stimulation.
Avoid continuous stimulation; just a small shock will suffice. Continue the training sessions daily until your dog sits quietly when the doorbell rings.
Along with the collar, use treats to reinforce positive behavior. Even if your dog barks when the doorbell rings, praise him when he becomes quiet and give him a treat.
Warnings
Not all trainers approve of using E-collars because a dog may not understand why he is receiving the shock, and he may become anxious or fearful. Electronic collars should not be used as punishment. In addition, puppies under 6 months old may not be mature enough for this type of training. Verbal commands must always be used in conjunction with an E-collar.


| A New Free Course on Dog Grooming Reveals the Secret Step-by-Step Techniques used by the best Dog Groomers in the country! Finally, You Can Now Groom your Dog on your own at home without having to hire an expensive groomer! |